How to Use the Built – in Webcam on an All in One PC
As a supplier of All in One PCs, I’ve witnessed firsthand the growing importance of the built – in webcam in our daily lives. Whether it’s for business meetings, online classes, or just staying in touch with loved ones, the webcam on our All in One PCs has become an essential feature. In this blog, I’ll guide you through the process of using the built – in webcam on an All in One PC, from basic setup to advanced usage. All in One PC
1. Initial Setup
When you first unpack your All in One PC, the built – in webcam is typically pre – installed and ready to use. However, there are a few steps you need to take to ensure it functions properly.
First, check the physical connection. Although the webcam is built – in, it’s still important to make sure there are no loose parts or visible damage. Look at the camera lens, usually located at the top center of the monitor. If there’s a cover or a privacy shutter, slide it open to expose the lens.
Next, you need to install the necessary drivers. In most cases, modern All in One PCs come with the operating system already configured to recognize the webcam. But if your system prompts you to install drivers, follow these steps. For Windows users, go to the Device Manager. You can find it by right – clicking on the Start button. In the Device Manager, look for the "Imaging devices" or "Cameras" section. If there’s a yellow exclamation mark next to the webcam, it means the drivers need to be updated. Right – click on the webcam and select "Update driver." You can choose to search automatically for updated driver software. For macOS users, the system usually takes care of driver updates itself, but you can check for any available software updates through the "System Preferences" and then clicking on "Software Update."
2. Testing the Webcam
Once the setup is complete, it’s time to test the webcam. Most operating systems have a pre – installed camera app that you can use for this purpose.
On Windows, you can open the "Camera" app. You can find it by typing "Camera" in the search bar on the taskbar. When you open the app, it should automatically detect the webcam and start showing a live feed. If you see a black screen or an error message, double – check the driver installation. You can also try adjusting the camera settings within the app. For example, you can change the resolution, the aspect ratio, or the brightness.
On macOS, open the "Photo Booth" app. It’s usually located in the Applications folder. Similar to the Windows Camera app, Photo Booth will display a live feed from the webcam. You can take pictures or record videos to test the functionality. If you encounter any problems, make sure the webcam is not being blocked by another app. Sometimes, an app like Skype or Zoom might be using the webcam, preventing other apps from accessing it.
3. Using the Webcam for Video Calls
One of the most common uses of the built – in webcam is for video calls. There are several popular video – calling apps available, such as Skype, Zoom, and Microsoft Teams.
To use the webcam for a video call, first, download and install the app you prefer. Once the app is installed, open it and sign in to your account. In most video – calling apps, you can access the settings menu to configure the webcam. Look for an option like "Video settings" or "Camera settings." Here, you can select the built – in webcam as your video source. You can also adjust the video quality, such as the resolution and frame rate, according to your internet speed.
Before starting an important video call, it’s a good idea to do a test call with a friend or colleague. This way, you can ensure that the webcam is working correctly, the audio is clear, and your appearance looks good. Pay attention to the lighting in your room. Soft, even lighting from the front is ideal for video calls. Avoid having bright lights behind you, as it can create a silhouette and make you difficult to see.
4. Recording Videos and Taking Photos
The built – in webcam on your All in One PC can also be used for recording videos and taking photos. As mentioned earlier, you can use the pre – installed camera app on your operating system.
To record a video, open the camera app and look for a button that resembles a red circle. Click on it to start recording. You can stop the recording by clicking on the same button again. The recorded video will be saved to your computer, usually in a folder like "Videos" or "Pictures."
To take a photo, look for a button that looks like a camera shutter. Click on it, and the photo will be captured instantly. You can then view and edit the photo using photo – editing software.
If you need more advanced features, such as adding filters, adjusting the focus, or using a timer, you can explore third – party camera apps. There are many free and paid apps available on app stores that offer a wide range of features for video recording and photo taking.
5. Troubleshooting Common Webcam Issues
Even with the best setup, you might encounter some common webcam issues. Here are some solutions to the most frequently reported problems.
No Video Feed: If the webcam doesn’t show any video, first check the privacy settings. Some operating systems allow you to restrict apps from accessing the webcam. Go to the privacy settings in your operating system and make sure the app you’re using has permission to use the webcam. Also, check if the webcam is being blocked by a physical object or if the privacy shutter is closed.
Poor Video Quality: If the video quality is poor, it could be due to a low – light environment. Try adjusting the lighting in your room or using a softbox light. You can also check the video settings in the app you’re using and increase the resolution or frame rate if your internet speed allows it.
Audio and Video Sync Issues: If the audio and video are out of sync during a video call, it could be because of a slow internet connection. Try closing other apps that are using the internet, such as streaming services or file – sharing apps. You can also try restarting your router to improve the connection.
6. Advanced Webcam Features
Some All in One PCs come with advanced webcam features that can enhance your user experience.
Facial Recognition: Many modern All in One PCs support facial recognition technology. This feature allows you to log in to your computer by simply looking at the webcam. To set up facial recognition, go to the security settings in your operating system and look for an option like "Windows Hello" (for Windows) or "Face ID" (for macOS). Follow the on – screen instructions to enroll your face.

Auto – Focus and Zoom: Some high – end All in One PCs have webcams with auto – focus and zoom capabilities. Auto – focus ensures that the image stays sharp, even if you move closer or farther away from the camera. Zoom allows you to get a closer look at a subject. You can usually control the zoom function through the camera app or the video – calling app you’re using.
7. Contact for Purchase and Consultation
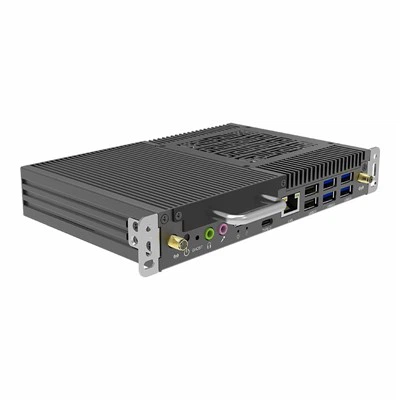
Customized OPS PC If you’re interested in purchasing an All in One PC with a high – quality built – in webcam, or if you have any questions about using the webcam on our products, we’d love to hear from you. Our team of experts is dedicated to providing you with the best solutions for your needs. Whether you’re a business looking for reliable video – conferencing equipment or an individual who wants to stay connected with friends and family, our All in One PCs are the perfect choice. Reach out to us to start a discussion about your requirements and explore the options available.
References
- Windows 10 User Guide, Microsoft
- macOS User Guide, Apple
- Skype Help Center
- Zoom Support Documentation
- Microsoft Teams Support Resources
Shenzhen HJS Technology Group
Shenzhen HJS Technology Group is one of the most experienced all in one pc manufacturers and suppliers in China, featured by quality products and good service. Please rest assured to buy CE approved all in one pc made in China here from our factory. For price consultation, contact us.
Address: F10, Wanhe Technology Building C, No. 7 HuiTong Road, Fenghuang Street, Guangming New District, Shenzhen. China.
E-mail: info@hjs-pc.com
WebSite: https://www.hjs-pc.com/
